From walk-in to paid
basicTurn a walk-in client into a completed, paid visit — booking, sale, receipt, and loyalty in one linked flow.
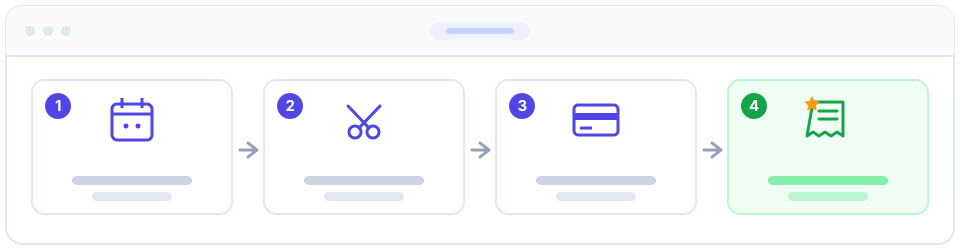
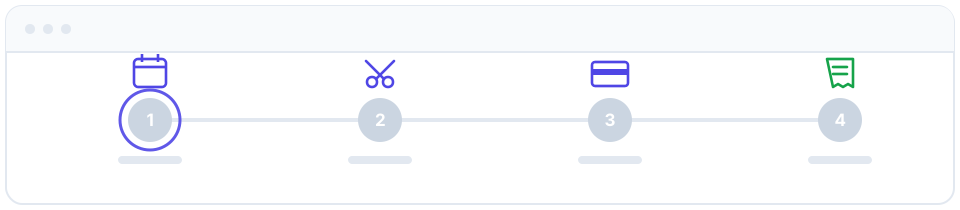
A walk-in is a client who shows up without a prior booking. This workflow takes you from the moment they arrive to a completed, paid visit, with every step recorded in one place. Because Apolaris AI links the appointment, the sale, the receipt, and the loyalty card together, you skip the double entry of paper books, spreadsheets, and a separate card reader, and nothing gets forgotten.
Who can do this
| Step | What it needs |
|---|---|
| Create the appointment | Any staffer who can open the calendar |
| Quick-add a new customer inline | can_add_customer |
| Take the sale / charge the client | can_manage_sales |
| Apply a discount code at checkout | can_manage_sales (or can_manage_discounts) |
A domain manager (is_manager) always passes all of these. A front-desk staffer who only books appointments but lacks can_manage_sales can run the visit up to the point of payment, but a colleague with can_manage_sales has to take the money. If a new client needs to be created on the spot, the person at the screen needs can_add_customer.
Step by step
- Create the appointment. Open the calendar and add a new appointment for right now. In the customer field, search by name or phone. If the client is new, use the quick-add option to create the customer on the spot — no need to leave the screen. (Quick-add requires
can_add_customer; without it, search for an existing customer or have a manager add the new one.) - Pick the service and professional. Choose the service(s) and assign the staff member who will do the work. The slot appears on the calendar so the whole team can see who is busy.
- Serve the client. Do the work as usual. The appointment stays open on the calendar while it happens.
- Mark it completed. When the service is done, open the appointment and mark it Completed. This confirms the visit happened and, for enrolled clients, adds a loyalty stamp (see Loyalty).
- Take the payment. You have two routes — the fast booking-linked one or the full POS: - Quick sale from the booking (recommended). From the appointment, start the quick sale. This creates the sale and the receipt straight from the booking and links them together, so the visit will not later show up in the missing-sales list as an unpaid appointment. The booked service is the first line; add any extra services or retail products, and enter a tip if the client leaves one. - Full POS. Alternatively, go to Sales & point of sale and start a sale for that customer. Use this when the visit is more than the booked service or you want the full cart tools.
- Confirm the total, split if needed, and charge. Apply a discount code if the client has one (requires
can_manage_salesorcan_manage_discounts). Then take the payment. A single method (cash, card, etc.) is the common case, but you can also split the payment across several tenders — for example part cash, part card. Each tender records its own method and amount, and the receipt is labelled Split when more than one tender is used. - Print or send the receipt. Print the receipt for the client or send it digitally. The visit is now fully recorded.
- Points are awarded automatically. If the client is enrolled in the loyalty program, their points are added the moment the sale is marked paid — no manual tracking needed.
Returning clients are even faster: skip the quick-add and just search the existing customer when you create the appointment.
The tip is recorded separately from the service total, so your sales reports and payroll stay accurate.
Split payments
When a client pays with more than one method, add a tender for each one. The available methods are:
| Method | Use for |
|---|---|
| Cash | Notes and coins |
| Card | Credit / debit card |
| Check | Paper check |
| Bank Transfer | Direct transfer |
| Other | Anything else |
The tenders must add up to the sale total (service + retail + tip, minus any discount). When you use two or more tenders the printed and emailed receipt shows the payment method as Split; a single tender shows that method by name.
If a stale or non-JavaScript screen submits no tenders at all, the sale still records a single full-amount payment so nothing is left without a payment record — but enter the tenders explicitly whenever you split.
Loyalty: stamp vs points
There are two separate loyalty mechanisms, and both only apply to clients who are enrolled (have a loyalty account). If the client has no loyalty account, nothing is credited.
| Trigger | What happens |
|---|---|
| Booking marked Completed | A stamp is added to the enrolled client's card |
| Sale marked paid | Points are credited to the enrolled client's account |
So completing the appointment and taking payment each contribute to loyalty in their own way — a stamp at completion, points at payment. Whether tips count toward earned points depends on your loyalty program settings.
Enrollment is a prerequisite. Enroll the client in the loyalty program first, or neither the stamp nor the points will be recorded.
Cross-data impacts
A walk-in that ends in a paid sale touches several parts of your data at once:
- Inventory decreases for any retail products on the sale.
- Analytics count the net sale total — applying a discount lowers the revenue your reports show.
- Loyalty credits the enrolled client's stamps and points as described above.
Marking the appointment Completed before taking payment is recommended best practice — it keeps the calendar, the loyalty stamp, and your analytics lined up — but it is not enforced. The system only blocks creating a second sale for the same booking; it does not require a particular booking status, and a standalone POS sale works regardless of booking status. Use the quick sale from the booking when you can so the visit stays linked and out of the missing-sales list.
Tips
- Add retail products to the same sale so the client pays once and your inventory updates automatically.
- New to the calendar or POS first? Read Appointments & calendar and Sales & point of sale before a busy shift.
- For the start-of-shift checklist that sets up a smooth rush, see Open up for the day.