Sales & point of sale
basicRecord sales, add items and tips, take split payments, apply discounts, and print or email receipts.
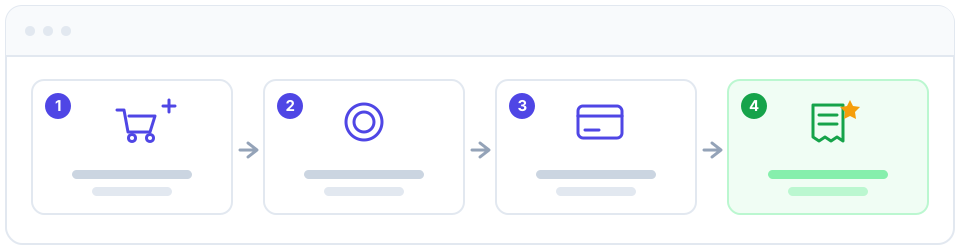
The point of sale (POS) is where you turn a visit into a recorded sale: pick the customer and the staff member, add the services or products sold, take payment (in one method or several), and hand over a receipt. Because every sale flows through one place, your revenue figures, customer history, loyalty points, commission, and payroll all update on their own. No re-keying numbers into a spreadsheet at the end of the day, and no chance of a sale being remembered in one app but missing from another.
Who can do this
Recording sales is a managed action — you cannot open the POS without the right privilege.
| Action | Required privilege |
|---|---|
| Create, edit, or delete a sale | Can Manage Sales (can_manage_sales), or any domain manager |
| View a sale's detail, print or email its receipt | Can View Sale (can_view_sale) |
| Apply a discount code at checkout | Can Manage Sales — see the discount note below |
A domain manager always passes these checks. Everyone else needs the specific privilege granted on their employee account. A staff member without Can Manage Sales who tries to open the POS is blocked. See Users & privileges.
Record a sale
- Open Sales and choose Add Sale.
- Fill in the Sale details: select the customer, the staff member who performed the work (this drives commission and reporting), the date, and any notes.
- Build the cart under Services on this sale: search for a service and click Add service, setting the Qty for each line. The subtotal updates as you go.
- Add a discount code, tip, or custom line if needed (see the sections below).
- Choose how the customer paid under Payment method — a single method, or several (see Take a split payment).
- Click Save. You land on the sale's receipt, ready to print or email.
The total recalculates automatically as you add or remove lines. If the sale has no cart lines, the amount you enter on the form is used as-is (a simple single-line sale).
The figure stored as the sale amount is always the net revenue — what the business actually earned after any discount, and excluding the tip. This single number feeds revenue, profit, loyalty earning, and the receipt total, so every report agrees.
Add custom lines and tips
- To charge for something that is not in your catalog, click Custom line and give it a name (concept) and a price. Custom lines are snapshotted onto the sale, so deleting a catalog service later never erases or changes a historical receipt.
- To record a gratuity, enter the tip amount.
A line price cannot be negative. The system rejects negative prices on every entry path, so a custom line can never be used to discount or reduce the sale total. Use a discount code instead.
Tips are a pass-through to staff, not business income. They are kept out of your revenue totals and out of the receipt total (shown separately below it). Each tip is paid out in full and untaxed through payroll to the tip recipient, which defaults to the sale's staff member. Because of this, always attach the correct staff member — it drives commission, payroll, the tip payout, and the per-employee figures in Analytics.
Apply a discount code
- In the cart, type the customer's discount code and click Apply.
- The code validates and the Total after discount updates instantly. Click Remove to clear it.
Invalid, expired, or used-up codes are rejected automatically. See Discount codes to create and track them.
Applying a code at checkout rides on Can Manage Sales — a cashier does not need the separate Can Manage Discounts privilege (that one is for creating codes and reading the impact report). The discounts module must be enabled for the field to appear.
How a discount affects your numbers
A discount lowers the net revenue the sale records. The amount taken off is stored separately as the discount amount, while the sale amount becomes the post-discount net figure. On the receipt — both on screen and on the printed/emailed PDF — a discounted sale shows three lines:
Subtotal      $100.00
Discount (CODE)  -$10.00
TOTAL          $90.00
When no code applies, only the single TOTAL line is shown. Because reports count the net amount, every discount you apply reduces the revenue, profit, and commission those reports calculate — this is intended, but worth knowing when figures look lower than the list prices suggest.
Take a split payment
A sale can be settled with more than one tender — for example part cash, part card.
- Under Payment method, the first tender defaults to Cash for the full Total due.
- Click Split / add another method to add a second tender. Choose its method — Cash, Card, Bank transfer, Check, or Other — and enter the amount. Add a reference (transaction id, last 4 digits) if you like.
- The cart shows Paid and Remaining as you type. The tenders must add up to the total before you can save.
- Click Save.
When more than one tender is recorded, the receipt's payment method becomes Split and the receipt shows a Paid with breakdown listing each method and amount. A single tender records that one method as usual.
Add a reference to a card or transfer tender so the receipt and the sale record show how to reconcile it against your bank or terminal statement.
Generate, print, and email a receipt
After saving, you are on the sale's detail page where you can hand the customer a receipt two ways:
- Print receipt — opens a print-ready copy. You can also download a PDF from the receipt link on the sale.
- Email receipt — sends the customer an HTML receipt with the PDF attached. It uses the customer's email by default, or you can type a different address. Emailing requires the Can View Sale privilege and a working email setup for your organization (see Email setup). If sending fails, the page tells you so you can check the settings.
The receipt is rendered in your organization's language, so a sale in an English- or French-configured organization never produces a Spanish-only ticket.
Create a sale from a booking
When an appointment is marked completed, you can turn it straight into a sale without re-entering the customer, staff, or services — the booking details carry over to the cart.
- Open the completed booking on the calendar.
- Choose to create a sale from it.
- Review the pre-filled cart, add any tips or extras, take payment, and confirm.
A booking can have at most one sale. If you try to convert a booking that has already been turned into a sale, you get "This booking already has a sale." and are pointed to the existing one. This guard prevents the same appointment being counted twice in your revenue.
Payment status
Every sale carries a payment status. New manual sales default to paid; gateway-captured sales (card / OXXO / SPEI) start pending until the provider confirms.
| Status | Meaning | Counts toward revenue / commission / tips? |
|---|---|---|
| Paid | Money collected | Yes |
| Pending | Will be settled later | Yes (treated as collectible) |
| Failed | Capture failed | No — excluded |
| Refunded | Money returned | No — excluded |
Reports and totals use only the realized sales — everything except failed and refunded. So when you refund a sale, its revenue, profit, commission, and tip totals drop back out of every report and dashboard automatically; you do not adjust figures by hand.
Loyalty points are credited only when a sale is (or becomes) paid. A refunded or failed sale does not earn points.
How a sale flows through the system
Recording one sale touches several modules at once. Knowing this helps you understand why the numbers move where they do.
- Analytics & reporting — net revenue, profit, and per-employee performance update from the sale's amount and attributed staff member. Refunded/failed sales are excluded.
- Loyalty — a paid sale credits the customer's loyalty balance, but only if the customer is enrolled in an account under an active loyalty program. A non-enrolled customer earns nothing. Points are calculated on the net amount (points per currency × amount), and include the tip only if the program is set to earn on tips. There is no manual point tracking.
- Payroll & commission — the attributed staff member drives commission, and the tip is paid out untaxed via payroll to the tip recipient.
- Customer history — linking the customer keeps their visit and spend history complete, which makes follow-ups and promotions far easier than scattered notes.
- Inventory — products sold draw down stock.
The biggest single thing you can do for accurate reporting is to always link the correct customer and the correct staff member to every sale.