HR: team, leave & documents
proRun the team directory, weekly schedules, configurable leave, documents with expiry alerts, and time & attendance — all connected to the calendar and payroll.
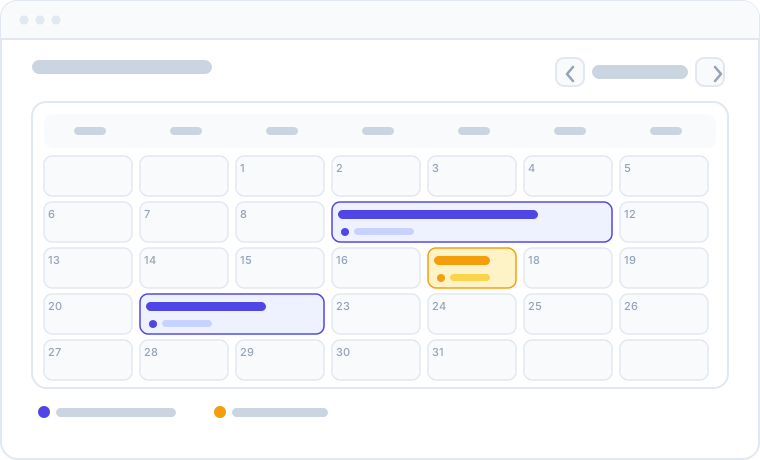
The HR module is the single place to manage your people: who's on the team, when they work, who's off and when, which documents are on file, and who actually showed up. Instead of juggling spreadsheets, paper forms, and group chats, everything lives in one connected system that talks to your calendar, payroll, and analytics.
Open HR from the sidebar to reach the directory, schedules, leave, documents, and attendance. Most administrative screens are manager-only — see Who can use HR for the exact split.
Who can use HR
Access in Apolaris AI is granular: a domain manager (is_manager) always has full access, and other employees get only the specific privileges granted to them. The HR module is gated mostly by is_manager, with three dedicated leave privileges for delegating leave work below manager level.
| Action | Who can do it |
|---|---|
| View the directory, leave overview, leave calendar, attendance clock | Any signed-in employee |
| File leave for yourself | Any signed-in employee (can_request_vacation adds the menu link) |
| Approve / reject leave, manage balances, manage leave types, leave analytics | is_manager or can_approve_vacation |
| Documents, document templates, attendance dashboard, check-in/out correction grid, weekly schedules, meal & break rules | is_manager only |
| Payroll | is_manager only (see Payroll) |
The three live leave privileges are can_request_vacation, can_approve_vacation, and can_view_vacation_calendar. A non-manager approver is also site-scoped: they may only approve leave for employees who work in one of their visible sites (their employee's sites plus any explicit grants — see Switching sites & visibility). A manager oversees every site.
can_view_vacation_calendar is intended to gate the leave calendar, but the calendar currently requires only that you are signed in — it does not enforce that privilege. Any signed-in employee can open it. If you rely on the calendar to hide who is off, treat that visibility as organization-wide for now.
Employee directory & org chart
The directory lists every active team member with their role, site, contact details, and status. Use the search box and column filters to find a person by name, position, or department.
The org chart is a grouping view, not a person-to-person reporting tree — there is no "reports to" relationship on an employee. It has two modes:
- By department — employees grouped under their department, with the department's designated manager shown at the top of each group. Anyone without a department lands in an "unassigned" bucket.
- By site — employees grouped under the location(s) they work at. An employee assigned to several sites appears under each one.
- Open HR → Directory.
- Use search to find a person; click through to their profile, where leave, documents, and attendance are all in one view.
- Switch the view to org chart (by department) or by site to see the grouped structure.
People and their permissions are defined under Employees, users & permissions. To group people into departments, use HR → Departments. To add a new hire end to end, follow Onboard a new employee.
Site assignment & calendar visibility
Two settings on the employee form (HR → Add employee / Edit employee) control where a person shows up:
- Assigned sites is optional. The site picker's hint reads "Optional — hold Ctrl (or Cmd on Mac) to select multiple sites, or leave empty to assign later." Leave it empty for an owner, a roaming manager, or someone hired before their site is decided, then assign the site later by editing the employee. Until then, a site-less employee simply appears on no site-filtered calendar or employee picker.
- Visible in booking calendar. This checkbox (on by default) carries the help text "Show this employee in the booking calendar with their availability. Turn off for managers or staff who don't take appointments." Turning it off removes the person from the calendar columns, the employee pickers, and the availability and capacity calculations — their existing bookings stay visible in the bookings list.
Weekly schedules
Each employee has a recurring weekly working pattern. The system is sparse and default-driven: you only set a day when it differs from the norm.
- The default working hours for any weekday are the assigned site's opening hours.
- A weekday can be set to Day off or to Custom hours.
- For a single date, the effective hours resolve in this order: approved leave → a one-off dated shift → a site public holiday → the weekly pattern → the site's opening hours. A public holiday makes the day non-working for everyone following site hours or a weekly pattern; an explicit dated shift beats it, which is how you deliberately staff a holiday. See Closed days: closures and public holidays.
To edit schedules (manager only):
- Open HR → Weekly Schedules for the roster overview. Each row shows how many custom days and days off an employee has, or that they simply follow site hours.
- Click an employee to set each weekday to Default, Day off, or Custom hours.
- Use the bulk action to clear overrides, mark days off, or set custom hours for many employees at once.
Leave most days on Default so a change to a site's opening hours automatically flows through to everyone working that site. Only override the exceptions.
These schedules feed the appointment calendar's bookable windows and the occupancy figures in analytics, so keeping them accurate keeps booking conflicts and utilization reports correct.
Meal & break rules
Meal and break windows are configured at three levels, with the most specific one winning: organization default → site override → employee override. Each period has a name, start/end time, and a paid/unpaid flag.
- Open HR → Meal & Break Rules (manager only).
- Set the organization default schedule.
- Optionally override it for a specific site or employee (turn off "use default" to set custom periods).
Break windows are excluded from bookable time, so the calendar won't let an appointment land on a break, and occupancy is measured against working time minus breaks.
Leave: requests, approvals & balances
Leave runs as a clean request-and-approve flow, so nothing gets lost in messages and everyone can see remaining balances.
Leave types are configurable
Leave types are not a fixed list — each organization defines its own under HR → Leave Overview (managers and approvers). A leave type has:
| Setting | What it controls |
|---|---|
| Name & color | Label and calendar color |
| Max days per year | Default annual allocation |
| Requires approval | Whether requests of this type need sign-off |
| Paid | Whether the leave is paid (unpaid leave drives a payroll deduction) |
| Supports hourly | Whether the type can be requested by hours (a partial day), not only whole days |
| Carry-over | Whether unused days roll into next year, and the maximum carried over |
| Advance notice | Minimum days of notice required |
Filing a request
- Staff submit a request with a leave type, dates, and a reason. If the type supports it, they can request hours (a partial day) instead of whole days — hourly leave must start and end on the same day, and only blocks that specific time window on the calendar rather than the whole day.
- An approver reviews pending requests and approves or rejects them, with the decision recorded and the employee notified.
- Balances update automatically when leave is approved.
- The leave calendar shows who is off and when, so you avoid approving overlapping absences during busy periods.
A non-approver may only file leave in their own name — the system re-pins the request to the submitter's own record server-side, so you cannot file against a colleague. When a manager or approver files leave for someone else, it is auto-approved (and the employee is notified) because the act of filing already carries approval authority.
Balances and the overdraw backstop
Balances are tracked per leave type, per year, with four components: allocated, used, carried over, and adjusted (manual corrections). Available = allocated + carried over + adjusted − used. Manage them under HR → Manage Balances, including a bulk "apply defaults / set all" action.
Approval is backstopped: approving a paid, whole-day request that would push usage past the available balance is blocked (only when a balance row exists for that type). To override a genuine emergency, mark the request as an emergency. Hourly and unpaid types are not subject to this check.
Approved leave flows straight into the appointments calendar and into Payroll: a whole-day leave blocks that staffer's bookable time, and approved unpaid leave produces a payroll deduction line. If an approved leave overlaps existing appointments, you'll be prompted to reassign or handle those bookings before they silently conflict.
Leave analytics
HR → Leave Analytics (managers and approvers) summarizes the current year: total days taken, pending requests, approval rate, a breakdown by leave type, by month, by department, and the top leave-takers. Use it to spot seasonal patterns and staffing pressure before it bites.
Documents with expiry alerts
Store contracts, IDs, certifications/licenses, permits, and medical/health documents against each employee, and never get caught out by an expired document again. Documents are manager-only (HR → Documents).
- Open HR → Documents and add a document for an employee: choose a type, upload the file, and optionally set an issue date and expiry date.
- Apolaris AI computes a status from the expiry date:
| Status | Meaning |
|---|---|
| Expired | The expiry date has passed |
| Expiring | 30 days or fewer until expiry |
| Valid | More than 30 days away |
| (none) | No expiry date set |
- Expiring and expired documents surface in a needs-attention list.
You can dismiss an alert to hide it without deleting the document. The dismissal is sticky — but it auto-clears when the document is renewed (i.e. when its expiry date changes on edit), so a re-expiring document resurfaces on its own.
Always set an expiry date on time-bound documents (licenses, visas, certifications) — the expiry status and the renewal reminder only work when there's a date to track.
AI-drafted document templates
Reusable HR document templates (a labour contract, new-hire pack, NDA…) let you generate a filled PDF per employee. Managers manage these under HR → Documents → templates.
- Create a template by giving it a name and type. Either paste the body or provide a short brief and let the AI draft the body (when the AI copilot is enabled).
- Review and edit the draft. You can also ask the AI to revise the body with a free-text instruction; the change previews live and isn't saved until you click save.
- Use built-in placeholders that fill in automatically per employee and from your organization settings —
{{employee}},{{site}},{{position}},{{salary}},{{hire_date}},{{date}},{{company}}, and the{{company_*}}details. You can also add your own custom fields (a contract number, a probation length): Apolaris detects them on save and lets you decide whether each is stored per employee, shared company-wide, or asked for each time. - Generate the document for a chosen employee. It fills everything in, asks only for the fields still missing (reusing any employee details you've stored before), renders a PDF attached to that employee, and shows an in-place preview.
If a built-in placeholder has no source data (e.g. the employee's salary is blank, or company details are missing in Organization settings), generation still succeeds but warns you, listing the empty fields. Fill the source data and regenerate.
When you save a template that introduces new custom fields, managers get an in-app notification so the fields can be set up before anyone generates from it. For the full workflow — custom fields, scopes, the field configurator, and generation — see Generate HR documents from templates.
Time & attendance
Replace paper timesheets with real clock-in / clock-out records that managers can review and correct — and know, for every punch, where and how it was made.
Clocking in and out
A time record has one of these sources:
| Source | How it's created |
|---|---|
| Kiosk | A shared Attendance clock screen at the front desk where staff tap their name (HR → Attendance clock) |
| Web | A user clocks themselves in/out from the dashboard or the employee workspace (Caja) |
| Staff enrolled in the WhatsApp staff assistant write clock in / clock out — or share their location first | |
| Manual | A manager enters or fixes a record in the correction grid |
| Camera | A manager attributes a camera-detected arrival and opts to punch the clock |
| Automatic | The closing-time sweep closed a session nobody clocked out of (flagged, never silent) |
A non-manager may only clock themselves; the kiosk lets a manager — or anyone holding Manage attendance — tap any name of the branches they cover.
What every punch records
Every clock in and clock out records the position the device reported (when the browser or phone granted it), the client network address, the distance to the site and — when a check-in station vouched for it — the Wi-Fi network. Recording is on by default so a manager can later verify that a punch was made at the site; the person sees a short notice on the attendance clock, which you can word yourself in HR → Check-in rules.
Only allow clock-in at the site (optional)
Two rules can be enforced, both off by default, for the organization or per site (HR → Check-in rules):
- Near the site — within a radius of the site's map pin (100 m by default, plus the phone's own accuracy up to 50 m). Add coordinates on the site page first.
- On the site's network — the punch must come from the site's Wi-Fi or connection. This needs a check-in station: a small agent on the front-desk PC (Windows or Linux) that reports the Wi-Fi it sees and vouches for punches made on that PC; phones on the same connection are recognised as well.
When both are on, passing either is enough. A rule that cannot be judged (no position, station switched off) never locks the team out: the punch goes through, flagged as unverifiable. A refused punch is listed in the day's report.
Recording or requiring a location is lawful in some regions only, and always something to tell staff about. Keep the notice honest and check local law before requiring it — especially over WhatsApp, where it is a separate switch.
Check-in stations
The rules page walks you through it in four steps, next to each site:
- Add a station under the site — a name (e.g. “Front desk PC”) and the operating system of that computer.
- Download the installer — Windows (
.ps1), macOS (.command) or Linux (.sh). It carries a single-use code valid for 24 hours; download a fresh one to reinstall. - Run it once on that computer, as administrator — Windows: right-click PowerShell → Run as administrator, then
powershell -ExecutionPolicy Bypass -File .\apolaris-checkin-station-….ps1; macOS: double-click the.commandfile (Terminal opens and asks for your Mac password); Linux:sudo bash apolaris-checkin-station-….sh. - Check it shows online — within a minute the station appears with a green dot and the Wi-Fi name it sees, which is added to the site's networks. Then decide whether to turn on Only allow clock-in from the site's network.
The agent starts with the machine (a scheduled task on Windows, a launchd daemon on macOS, a systemd service on Linux), needs no login, listens only on the computer's own loopback and never sees who clocks in. Windows needs nothing else; macOS and Linux need python3 (macOS offers to install its command-line tools). Recent macOS versions may hide the Wi-Fi name from background programs — the station still vouches for that Mac, the site just learns no network name from it. Remove it with the same installer and -Remove (Windows) or --remove (macOS, Linux), or delete the station on the rules page.
Schedules, lateness and absences
Who was due in comes from the same rules as everywhere else in HR: approved leave, a dated shift, the weekly schedule, the rota on the employee page, then the site's opening hours. A first punch later than the schedule plus the late grace (10 minutes by default) is flagged late; a last punch before the end minus the grace is left early; a punch on a day off is unscheduled.
An employee with no explicit schedule works the site's hours by default, but on such a default day nobody is reported late, left early or absent — a missing punch shows as no record — unless you turn on Count a missing punch as an absence even without an explicit schedule, which judges the default hours the same way as a real schedule.
Alerts and the closing-time summary
Managers who cover a site (managers, and anyone holding Manage attendance for that branch) can get — all three are off until you switch them on in HR → Check-in rules:
- No-show alerts — once per person per day, when someone due in has not clocked in after the grace period.
- Off-site alerts — a punch made away from the site or off its network, as it happens.
- The closing-time summary — a set number of minutes after the site's closing time (10 by default): who came in, late arrivals, absences, early leaves, sessions still open (closed automatically and flagged, so payroll never inherits a 19-hour shift) and unverified punches. It is also kept on the dashboard.
Which channels are used (push, email, SMS) is set for the organization on the check-in rules page; each manager can still mute either category in their notification preferences.
Attendance dashboard
HR → Attendance shows, for any day and branch: expected vs actual per employee (schedule, in, out, hours, status, location and network checks), what needs attention, who is clocked in now, the summaries sent, what the cameras saw at each punch, the stations' health and the week's hours. Click a person for their patterns — typical arrival, punctuality, hours — built from the punches only.
Manager correction grid
Missed a punch? Wrong time? Open HR → Check-in / Check-out for a per-day grid with one row per session (a lunch break makes two; use + for another), editable inline and in bulk. Clearing both times removes the session. Every correction is stamped with who edited it and when, and the evidence of the original punch is kept.
Cameras at the moment of a punch (optional)
With the Cameras module and Ask the site's cameras what they saw at each punch on, each punch asks the site's door cameras for a sanitized reading of the entrance — a headcount, clothing colour and direction, never a face, an age, a gender or a name — plus a short encrypted burst of frames that expires with the cameras' retention window. The reading is matched against the doorway crossings the cameras already count, so the dashboard can say "the camera saw somebody arrive when the punch says so".
Camera corroboration is deliberately not identification. It tells you the entrance was crossed around the time of the punch; it never recognises who. Treat it as corroboration, not proof.
Notifications
Key HR events trigger notifications automatically: staff are told when a leave request is approved or rejected, and managers are alerted to pending requests. Each recipient can tune what they receive (and via email/SMS) in their notification preferences, including switching email to a daily or weekly digest. No one has to chase updates by hand.
Why this helps
- One source of truth for the team instead of scattered spreadsheets and chats.
- Schedules, leave, attendance, and documents are connected to the calendar and payroll, so booking windows, approvals, and pay stay accurate.
- Built-in expiry status keeps you ahead of expiring documents.