Customers
basicAdd and find customers, read their visit history and notes, and (managers only) lock a client to one professional.
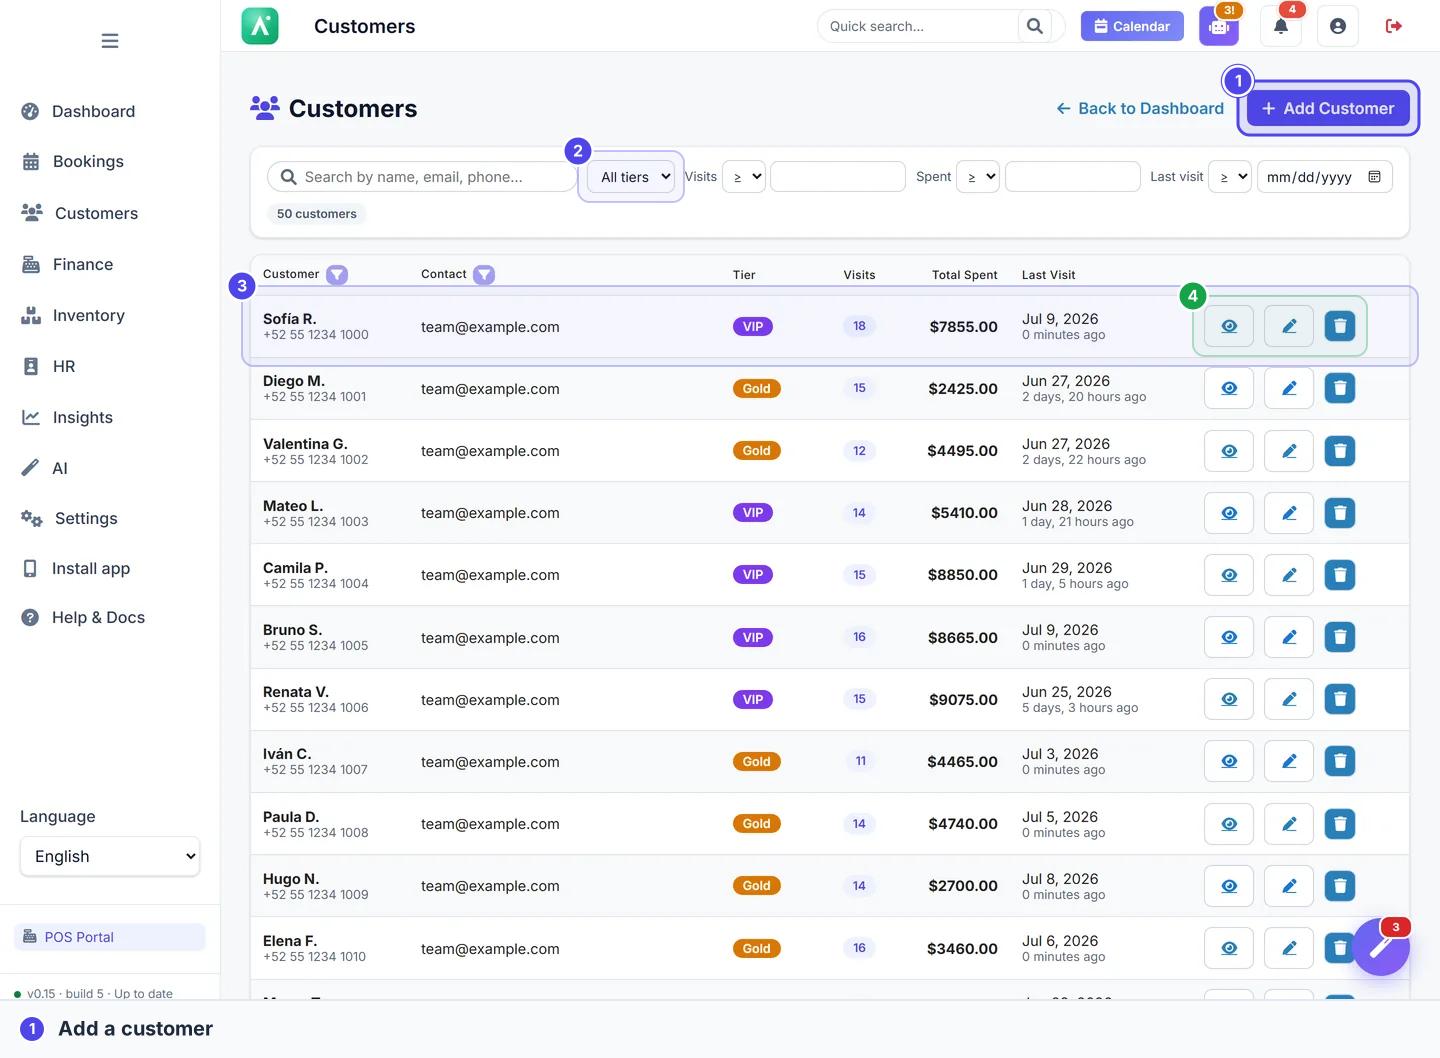
Your customer list is the heart of Apolaris AI: every appointment, sale, and loyalty point ties back to a single, shared profile. Instead of scattered notebooks, spreadsheets, or separate apps that never agree, everyone on your team sees the same up-to-date record, so service feels personal and clients keep coming back.
Who can do this
Customer actions are gated by per-privilege boolean fields on each staff account. A domain manager (is_manager) always passes. Anyone else needs the specific privilege granted under Users & privileges.
| Action | Privilege required |
|---|---|
| See the customer list and profiles | can_view_customer |
| Add a customer | can_add_customer |
| Edit a customer | can_edit_customer |
| Delete a customer | can_delete_customer |
| Lock a customer to a professional | is_manager only — no privilege grants this |
Customers are scoped to your organization. Staff see customers belonging to their organization (your tenant); they cannot see other organizations' clients.
Add a customer
- Open Customers from the sidebar.
- Click Add customer.
- Enter the first name. This is the only required field.
- (Optional) Add a last name, phone, email, address, or a note such as an allergy or preference.
- Click Save.
Only the first name is mandatory. Phone, email, and the other fields are all optional, so you can register a walk-in in seconds and fill in the rest later.
A phone number or email lets Apolaris AI send appointment reminders and receipts automatically, so add one whenever you can. See Reduce no-shows.
Email must be unique per organization
If you do add an email, it has to be unique within your organization, you cannot have two customers with the same address. The form shows the helper text "Must be unique within your organization." and rejects a duplicate on save.
For a walk-in with no email, just leave it blank. Apolaris AI handles the rest internally: it stores an obviously non-deliverable placeholder so the uniqueness rule never blocks you, and that placeholder is hidden from you in the booking flows (it shows as empty).
Find a customer
- Open Customers.
- Type a name, phone, or email in the search box at the top.
- The list filters as you type. Click a result to open the profile.
The same search also powers the customer picker when you book an appointment, so you can attach an existing client without leaving the calendar.
Phone search ignores formatting
Phone search is format-agnostic. Apolaris AI strips every separator, spaces, dashes, parentheses, dots, and the + country prefix, from both your query and the stored number before matching. So a customer saved as +52 55 7165 4651, (55) 7165-4651, or 55.7165.4651 is all found the same way.
- Type as few as 3 digits to start matching on phone.
- Searching
5571finds+52 55 7165 4651. - You never have to remember exactly how a number was typed in.
Because everything is connected, searching one customer instantly surfaces their full relationship with your business, no cross-referencing required.
The customer profile
Each profile gives you the whole picture at a glance:
- Visit & sales history — every past appointment and purchase, with dates and amounts.
- Total spent — lifetime value, so you can recognize your best clients.
- Loyalty points & tier — see the note below; the balance only grows for enrolled customers.
- Assigned professional — shown only when the customer is locked to a staff member (see Lock a customer to a professional).
- Notes — allergies, product preferences, or anything your team should remember.
Notes are visible to your team. Use them for service details, not for sensitive private information.
Loyalty points require enrollment
A customer's loyalty balance only moves once they are enrolled in an active loyalty program (they have a loyalty account). For a customer who isn't enrolled, a paid sale earns nothing, the balance stays at zero no matter how much they spend. If you expect points to accrue and they don't, check that the customer is enrolled and that the loyalty program is active. See Loyalty program.
Quick-add while booking
You don't have to leave the calendar to register a new client.
- Start a new appointment in Appointments & calendar.
- In the customer field, type the name. Matching existing customers (by name or phone) appear as you type, pick one to attach them.
- If there's no match, just keep the name you typed and continue booking, the calendar creates the new customer automatically when you save the appointment.
The new profile is saved as part of booking and is ready for next time. There is no separate "Add new customer" button in the calendar, saving the appointment is what creates the customer.
The point-of-sale workspace (Caja / "Nueva cita") has its own inline add-customer step, which is slightly different from the main calendar described here.
Automatic lead capture from WhatsApp
If your organization uses the Contact Center, the customer list also grows by itself: every new WhatsApp conversation creates a customer record immediately, identified by phone number and carrying a placeholder name until the person introduces themselves. The lead is in your CRM from the very first message, so you can find it right away by searching the phone number.
The record then fills itself in as the chat goes on:
- the name is saved the moment the customer states it, and
- email, birthday, and address are captured when the customer explicitly mentions them in the conversation.
Only records that were created automatically are completed this way — records your staff entered by hand are never overwritten.
You can also link a chat to your customer list manually: open the conversation in the Contact Center and click "Add as customer".
AI memory and privacy. To personalize WhatsApp conversations, the AI assistant keeps a small per-customer memory — preferences and facts the customer has shared, such as a favorite service. It updates automatically after each conversation. If a customer asks what is remembered about them, or wants it erased, contact Apolaris support, who can view or clear that customer's memory on request.
Lock a customer to a professional
Managers can tie a client to one specific staff member so that person is the only one who serves them, ideal for building trust and consistency, or for sensitive clients.
This is a hard lock, not a default. When a customer is locked, the assignment is enforced everywhere a booking is created or reassigned, the calendar, the form-based new-booking page, the staff portal, and the REST API. The professional cannot be changed at booking time: if someone tries to book the customer with a different staff member, Apolaris AI overrides it back to the locked professional (or refuses, with "This customer can only be attended by …", if that person doesn't have the right to assign others).
Set the lock when adding or editing a customer
The lock control appears on the Add customer and Edit customer forms, but only for managers.
- Open Add customer, or open a customer and choose to edit it.
- Find the field labelled Locked to professional (it has a lock icon).
- Pick the staff member, or choose "— Not locked (any professional) —" to leave the customer unlocked.
- Click Save.
The picker lists your organization's active staff (plus the currently-locked person, even if they've since been deactivated, so editing never silently drops the lock).
The lock is manager-only (is_manager). It is not governed by any can_* privilege. A privilege admin (someone with can_manage_privileges who manages other users) still will not see the lock control, and cannot grant it to anyone, because it is not a toggleable privilege. If you can't see the field, you are not a manager; only a manager can set or clear a lock.
What happens if the locked staff member leaves
If the locked employee is deactivated, the lock is automatically cleared (the customer is no longer tied to anyone) rather than blocking future bookings. The customer becomes bookable with any professional again until a manager sets a new lock. While the staffer is merely inactive, the booking flows treat the lock as not active, so service is never stuck.
Tips
- Register walk-ins fast: a first name is all you need; add the phone later.
- Keep phone numbers in any format you like, search finds them regardless of spaces, dashes, or the
+prefix. - Add a quick note after each visit, future-you (and your team) will thank you.
- Use total spent and loyalty points to spot VIPs and reward them. See Loyalty program and Run an influencer promo.
- A strong customer record powers better insights in Analytics & Data Explorer.