Onboard a new employee
proAdd a staff member end to end — employee record, sites, login, privileges, and where they land.
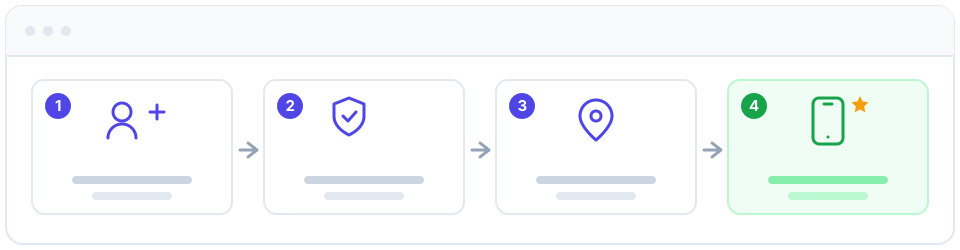
This recipe walks you through adding a team member completely: their employee record, the sites they work at, a login, their permissions, and any documents you keep on file. Doing it all in Apolaris AI keeps the person, their schedule, their pay, and their access in one connected place instead of scattered across a spreadsheet, a separate scheduling tool, and a folder of paperwork.
Before you start
Onboarding spans two different permission gates, so it helps to know which parts you can do and which you may need to delegate:
| Action | Who can do it |
|---|---|
| Create / edit the employee record | Domain manager only (is_manager) |
| Create the login user and set privileges | Domain manager, or a delegated privilege admin (can_manage_privileges) |
| Set customer locks | Domain manager only |
| Manage HR documents | Domain manager only |
In short: only a manager can add an employee, but user-and-privilege management can be delegated to a privilege admin who is not a manager. If you can't see the screens below, you're missing the relevant gate — ask your organization's manager. For background on how employees, users, and permissions fit together, see Employees, users & permissions.
An employee record is the person (their role, schedule, pay). A user is a login that lets them sign in, and the user is what carries privileges — not the employee record. They're linked but separate, so you can keep an employee on file without giving them access, and you can create these in two distinct steps.
Step by step
- Create the employee record. In the sidebar, open HR → Add Employee (a manager-only link; everyone with staff visibility also sees HR → Employees, the directory). Fill in their name, position, hire date, department, base salary, and bonus percentage. See HR: team, leave & documents for the full directory.
- Assign their sites. On the same form, choose which site(s) this person works at. This controls where they appear on the calendar and which data they can be scheduled against. This step is optional — you can leave the sites empty and assign them later by editing the employee (handy for an owner or roaming staffer); until a site is assigned, the person appears on no site-filtered calendar or picker. The same form also has a Visible in booking calendar checkbox (on by default): decide whether this person should appear as a bookable calendar column, and turn it off for managers or staff who don't take appointments. For a non-manager, their assigned sites also become part of what they can see once they have a login (combined with any explicit site grants). If you run more than one location, review Organizations & sites.
- Create a login user. This is a separate action from the employee record. Open Administration → Users and add a user, linking it to the employee record you just made. Apolaris AI sends a secure invite link so the person sets their own password — you never share or store one. See Users & privileges.
- Set their privileges. On the new-user form, grant only what the role needs — for example managing appointments, taking sales, or viewing reports. Each toggle is explained in the Privileges reference.
- Decide where they land. For front-desk or service staff, turn on Use employee portal so they land in the Employee workspace (Caja) at sign-in — a focused screen for their day. Right beside it is Lock to one workspace, which hard-locks the user to a single area with no switching (portal-only for front-desk staff, or management-only). Leave it off if the person should be able to move between both. See Employee workspace (Caja).
- (Optional) Lock customers. A manager can tie specific customers to this staffer so they're the only one who can serve or book them. See Lock customers below.
- (Optional) Add documents. In HR → Documents (manager-only), upload contracts, IDs, or certifications and set expiry dates so Apolaris AI reminds you before anything lapses.
Employee record vs login user
These are two distinct create steps on two different screens:
- Employee record (
HR → Add Employee) — the person: name, position, hire date, department, sites, salary. Manager-only. - Login user (
Administration → Users) — the account they sign in with, plus every privilege toggle. Manager or delegated privilege admin.
You can stop after the employee record (keep someone on file with no access) or create both in one sitting. Privileges, the "where they land" choice, and site visibility all live on the user, not the employee record.
What a privilege admin can and can't grant
If user management has been delegated to a privilege admin (a non-manager with can_manage_privileges), they can create users and grant most privileges — but an escalation guard stops them from toggling the two protected role flags, Manager (is_manager) and Manage Privileges (can_manage_privileges). Only a manager (or the platform operator) can promote someone to manager or grant the privilege-admin flag itself.
Lock customers (optional)
If you want a customer to be served by only one staff member, a manager can set a locked professional on the customer record. Once set, that customer can only be booked or served by that staffer — the lock is enforced in the calendar, the new-booking form, the staff portal, and the REST API, and cannot be overridden at booking time. Non-managers never see this control; it's a manager-only setting. See Customer locking for how it interacts with scheduling.
If the locked staff member is later deactivated, the lock is cleared automatically rather than blocking the customer — so a retiring employee never leaves a customer un-bookable.
Tips
Set up sites and privileges in the same sitting as the login. A user with no site or the wrong privileges signs in to a blank or broken screen and pings you on day one.
Privileges here can be stricter than what a person could otherwise do. Grant the minimum a role needs, then add more later — it's far easier than walking back access.
- For self-service tasks like requesting time off, point the new hire to their profile and the Employee workspace (Caja).
- When they're ready to clock real work, the From walk-in to paid workflow is a good first read.